

With the release of goreleaser v2, there's finally official support for notarizing macOS binaries! For those not familar with goreleaser, it's a great all-in-one platform for releasing Go applications. While the official docs are great, I wanted to write a quick guide for developers who aren't as used to the Apple Developer Program, like myself previously.
What is Notarization?
Notarization is a process where Apple verifies your application to make sure it has a Developer ID code signature and doesn’t contain malicious content. This allows us to tie back binaries to the creator as well as verify that macOS was able to verify there were no viruses at the time of upload. For more information about notarization, see Apple’s documentation on Notarizing macOS Software Before Distribution.
What we'll need
- An Apple Developer Account ($99/year) (we'll walk through this!)
- A Developer ID Application (not to be confused with an Installer!)
- An App Store Connect API key
Enrolling in the Apple Developer Program
First, we'll need to enroll your Apple ID in the Apple Developer Program. Before doing this, it's worth reading on if you'll need an individual or organization type. Apple provides guidance on its enrollment page. Unfortunately, I cannot provide any screenshots of this step because I've already enrolled my account and you can only do this once 😢
Creating Notarization Keys
Now that we have an account enrolled in the Apple Developer Program, we can create the following keys we'll need to give GoReleaser. Lets start with the Developer ID Application Certificate, which will be used to sign our binary to prove that it originated from us.
Creating the Developer ID Application Certificate
First, we'll need to create a Certificate Signing Request (CSR). This can be done through Keychain.app:
- Open
Keychain.app - Ensure the
loginkeychain is selected
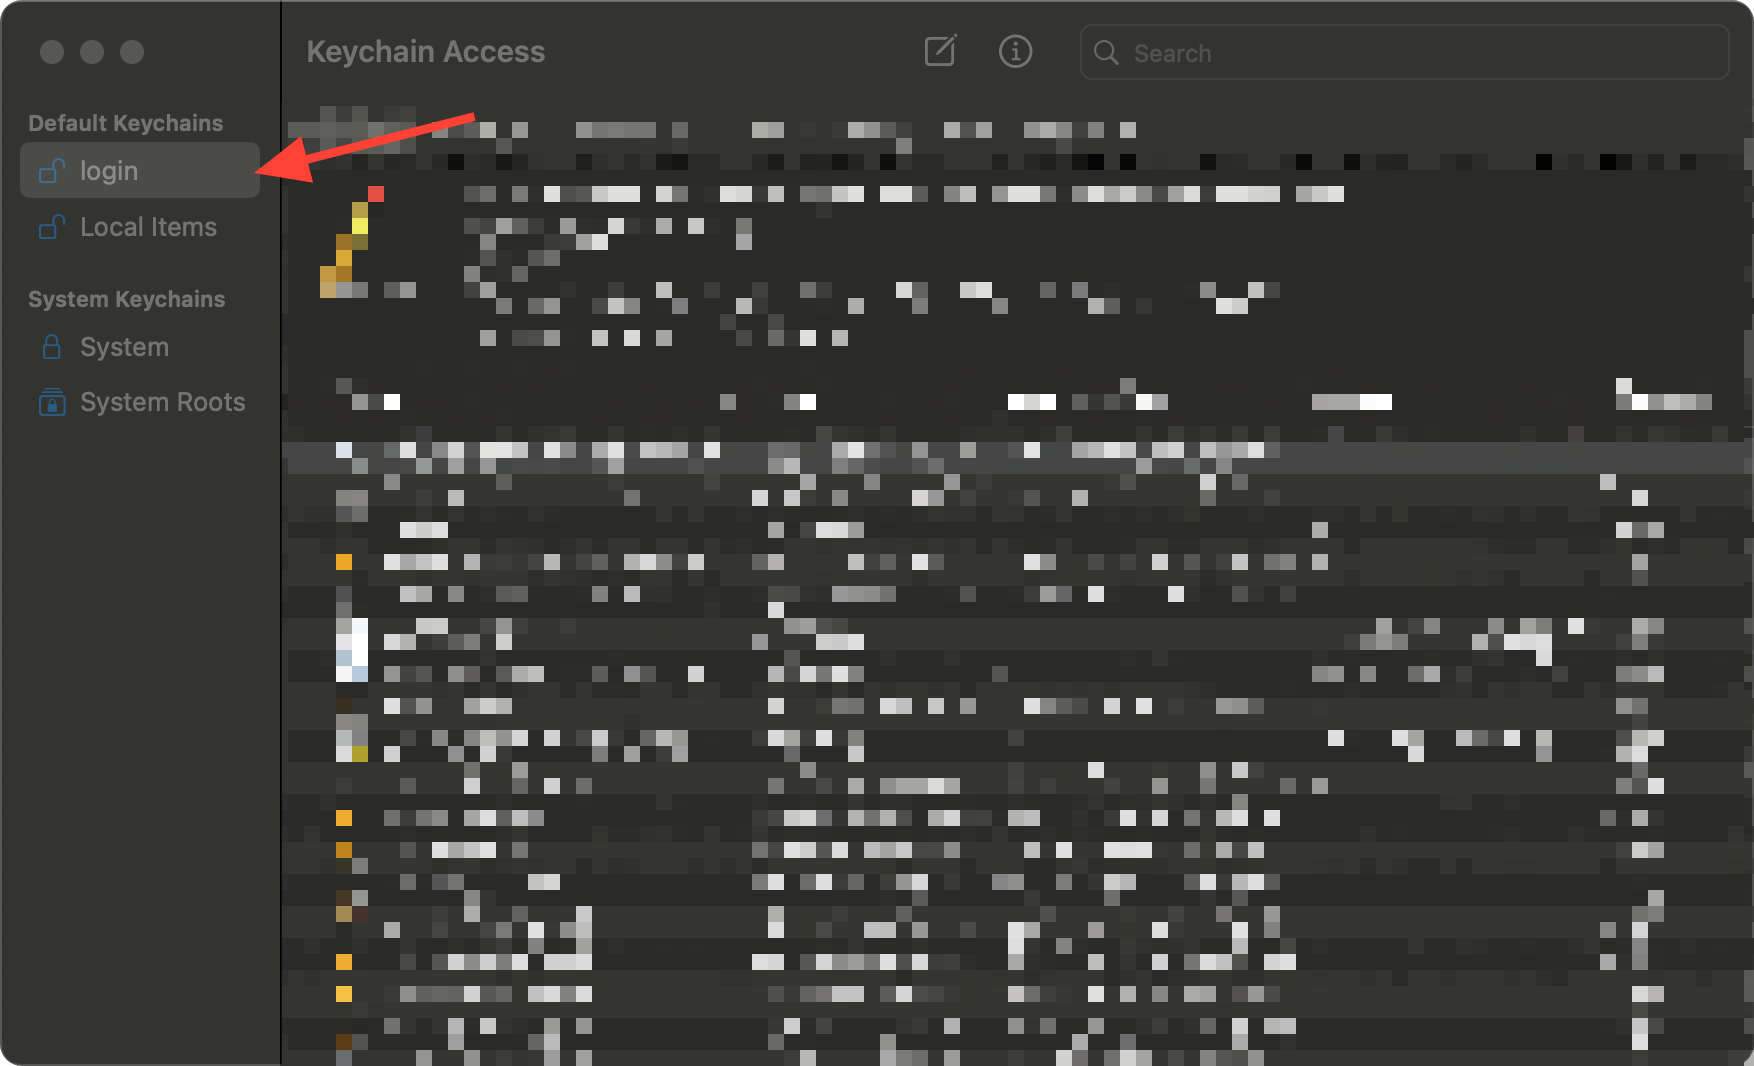
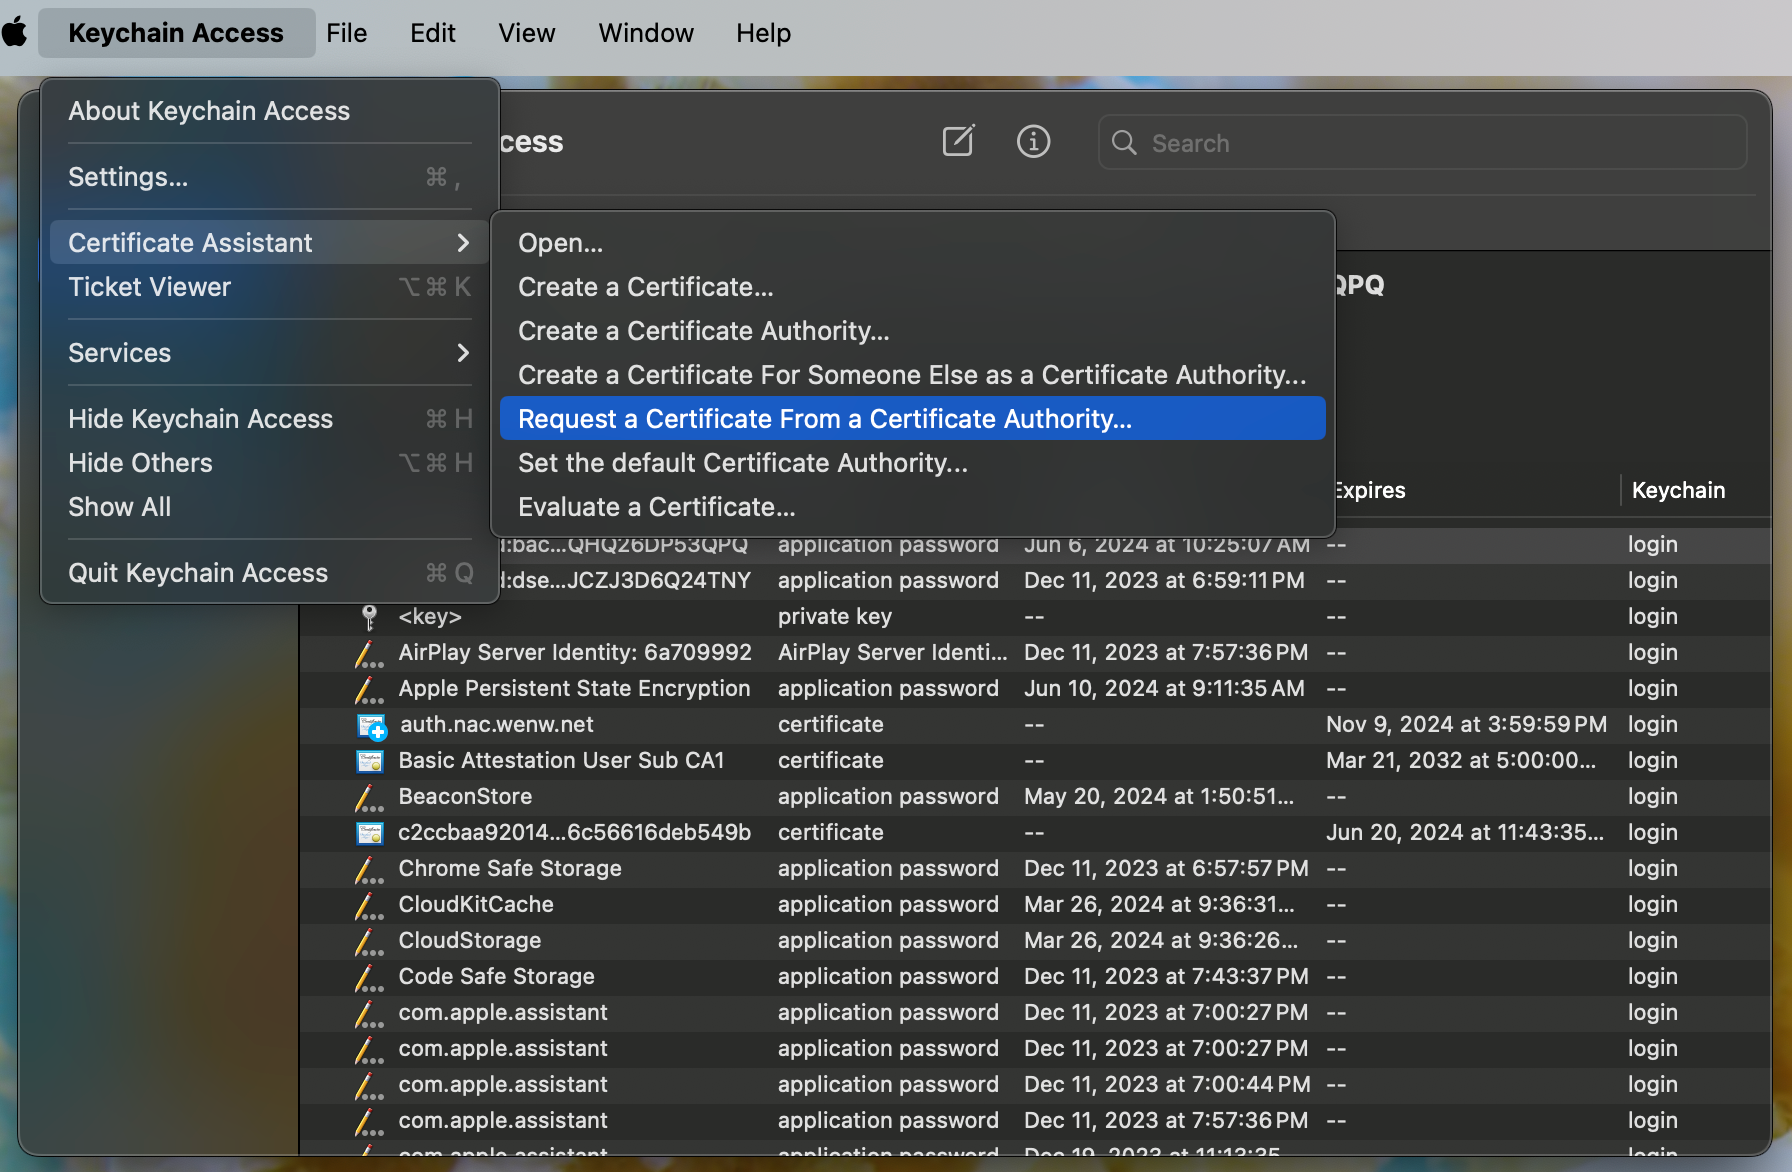
- In the top-header (make sure you have
Keychain.appin focus), create a new Certificate Request:-
Keychain Access > Certificate Assistant > Request a Certificate From a Certificate Authority
-
- That should open a "Certificate Assistant" form. We'll want to fill the following fields:
User Email Address: Your Apple ID email addressCommon Name:your_app_name-signing(I don't know if this actually matters)CA Email Address: Leave blankRequest is:Saved to diskLet me specify key pair information: Unchecked
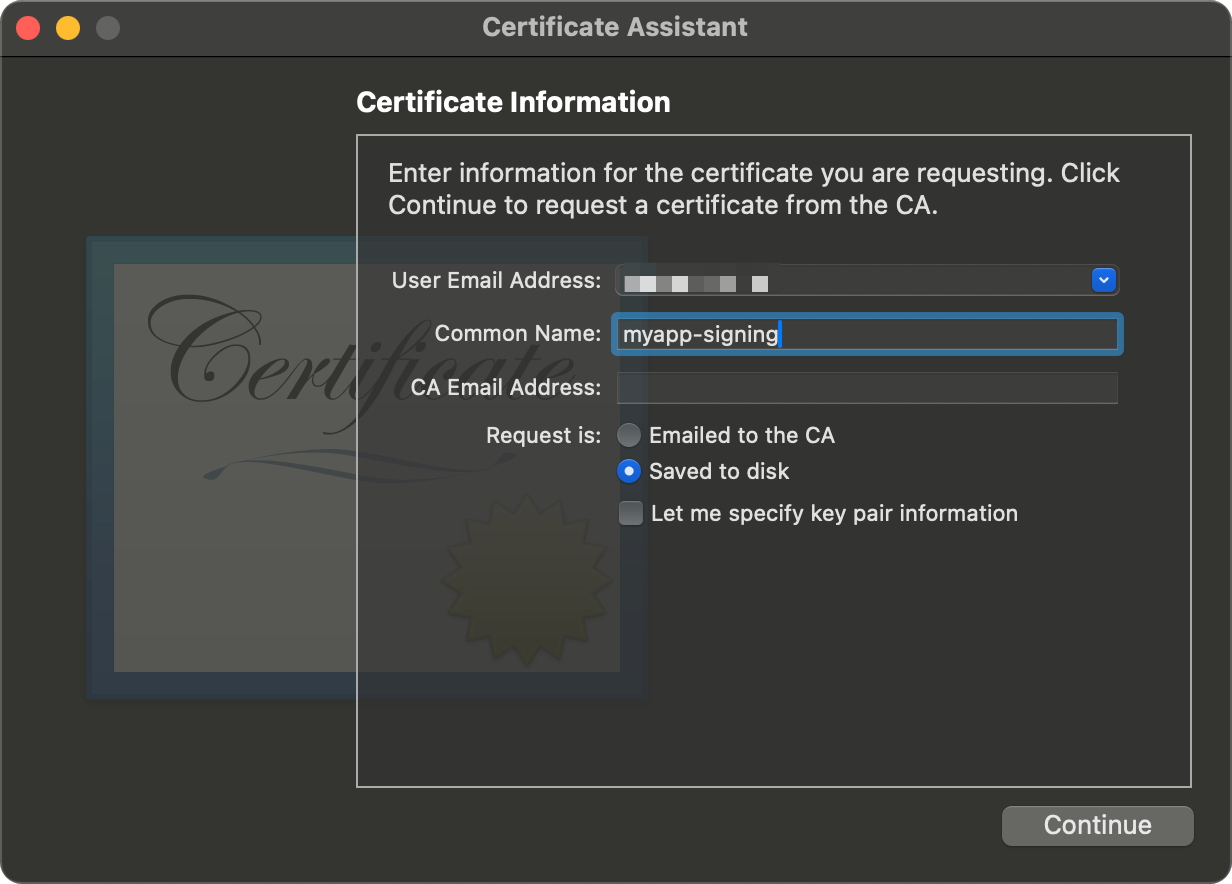
- Once you click
Continue, this should create aCertificateSigningRequest.certSigningRequeston yourDesktop.- Next we can use that to get a Certificate issued from Apple!
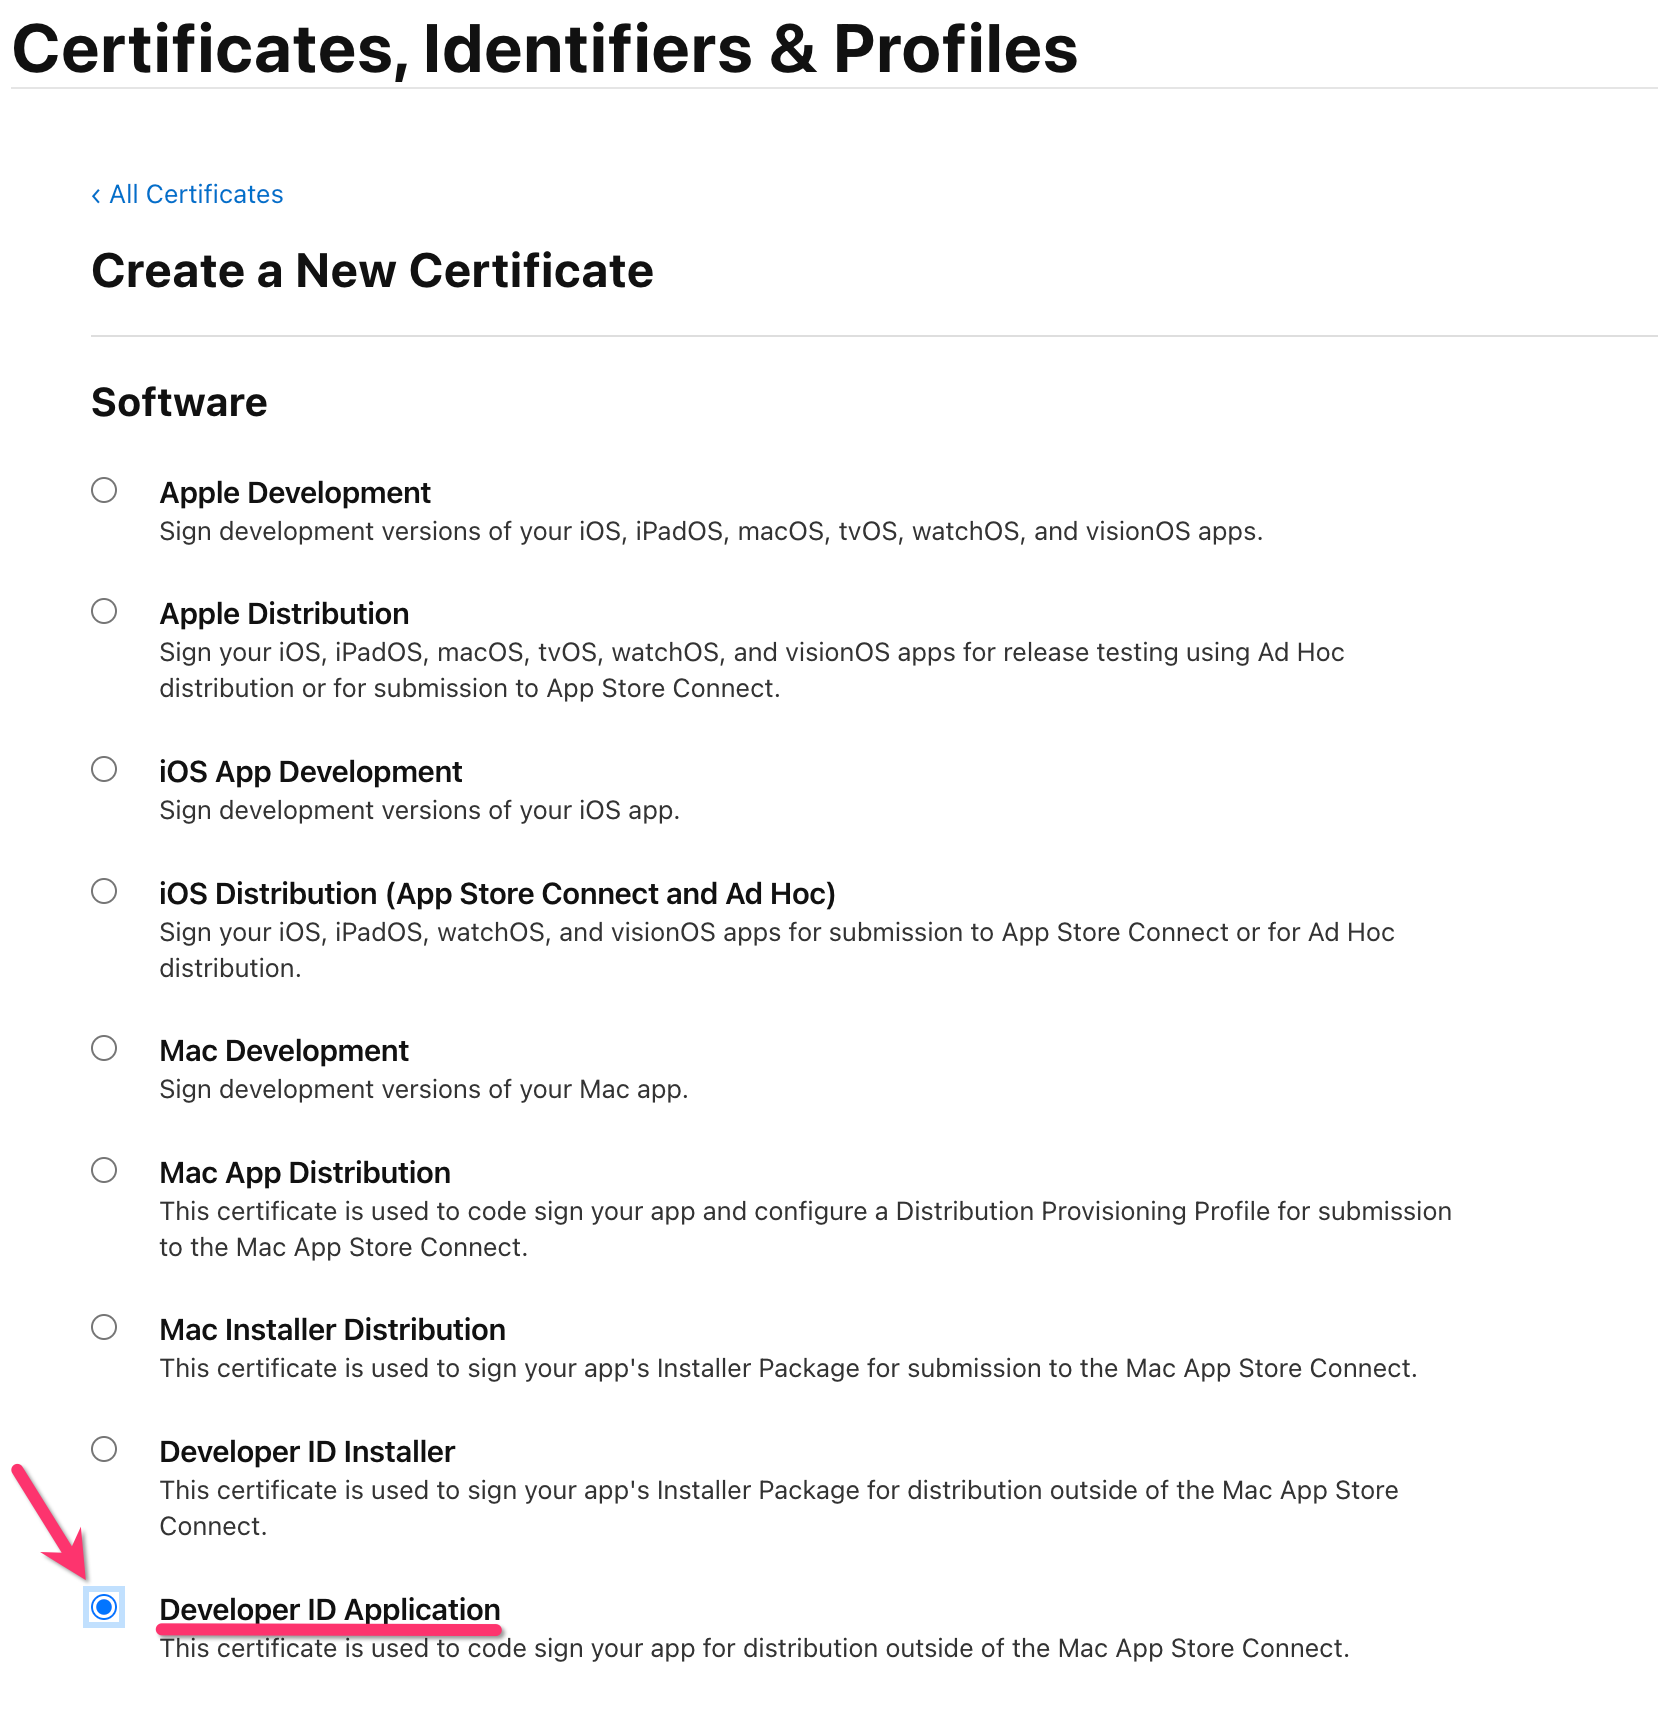
- Navigate to the Developer Certificates create page and create and
Developer ID Application(NOT anInstaller!) certificate
- Next, we'll be taken to a form to upload the
certSigningRequestfile we created earlierProfile Type:G2 Sub-CA(this certificate will last longer)Choose File: Upload thecertSigningRequestfrom earlier
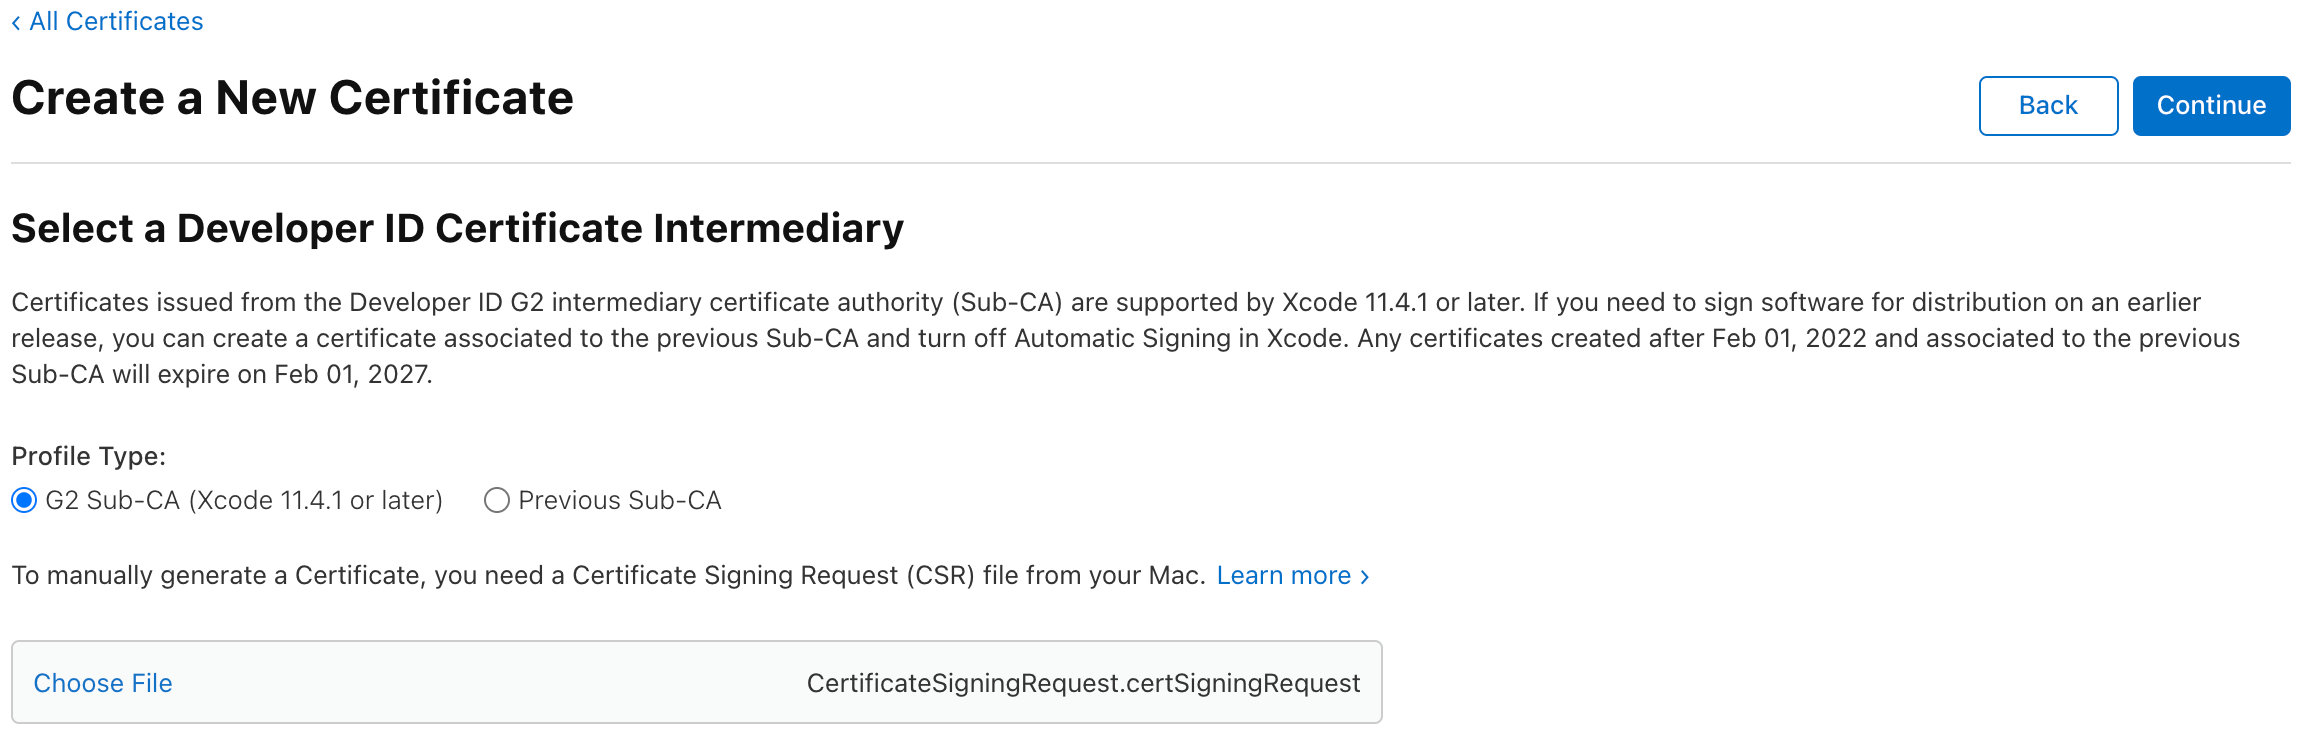
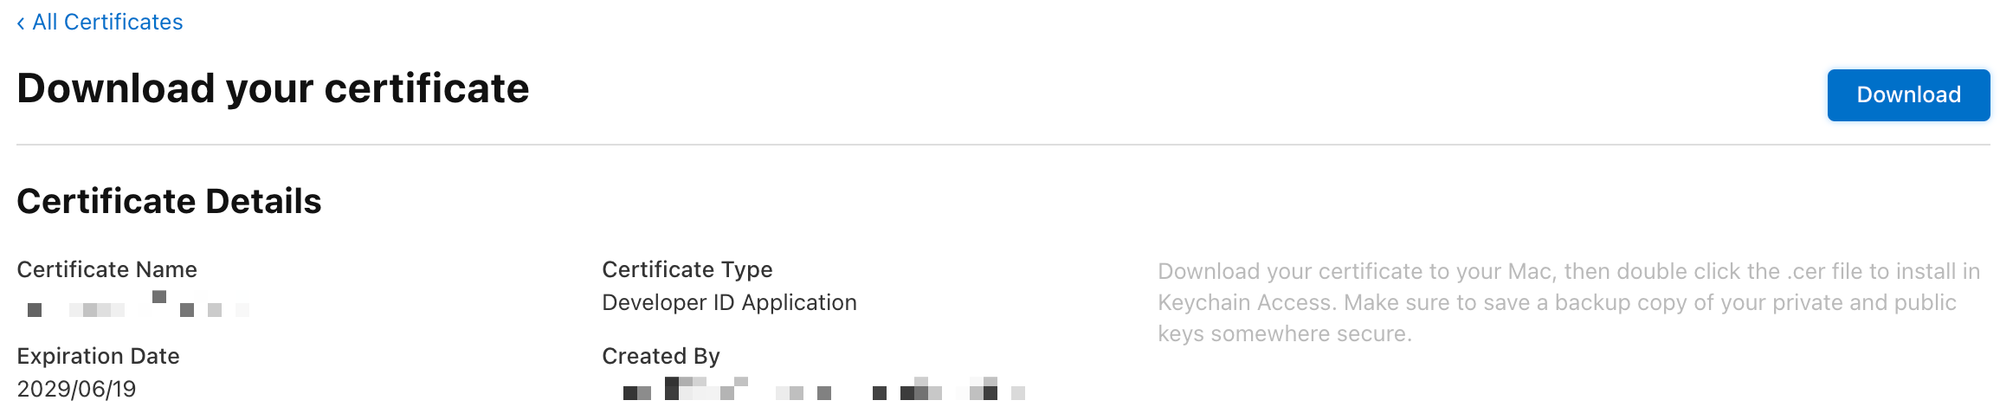
- Once you click
Continue, you'll be taken to a page where you can download the certificate (.cerfile)
Converting the .cer into .p12
GoRelease requires a .p12 file for reading. We'll do this through Keychain.app again. We'll assume your cer file is using the default name of developerID_application.cer.
- Double click the
.cer, this will "silently" import it into your Keychain - In the
loginkeychain, selectMy Certificatesto view your newly imported certificate
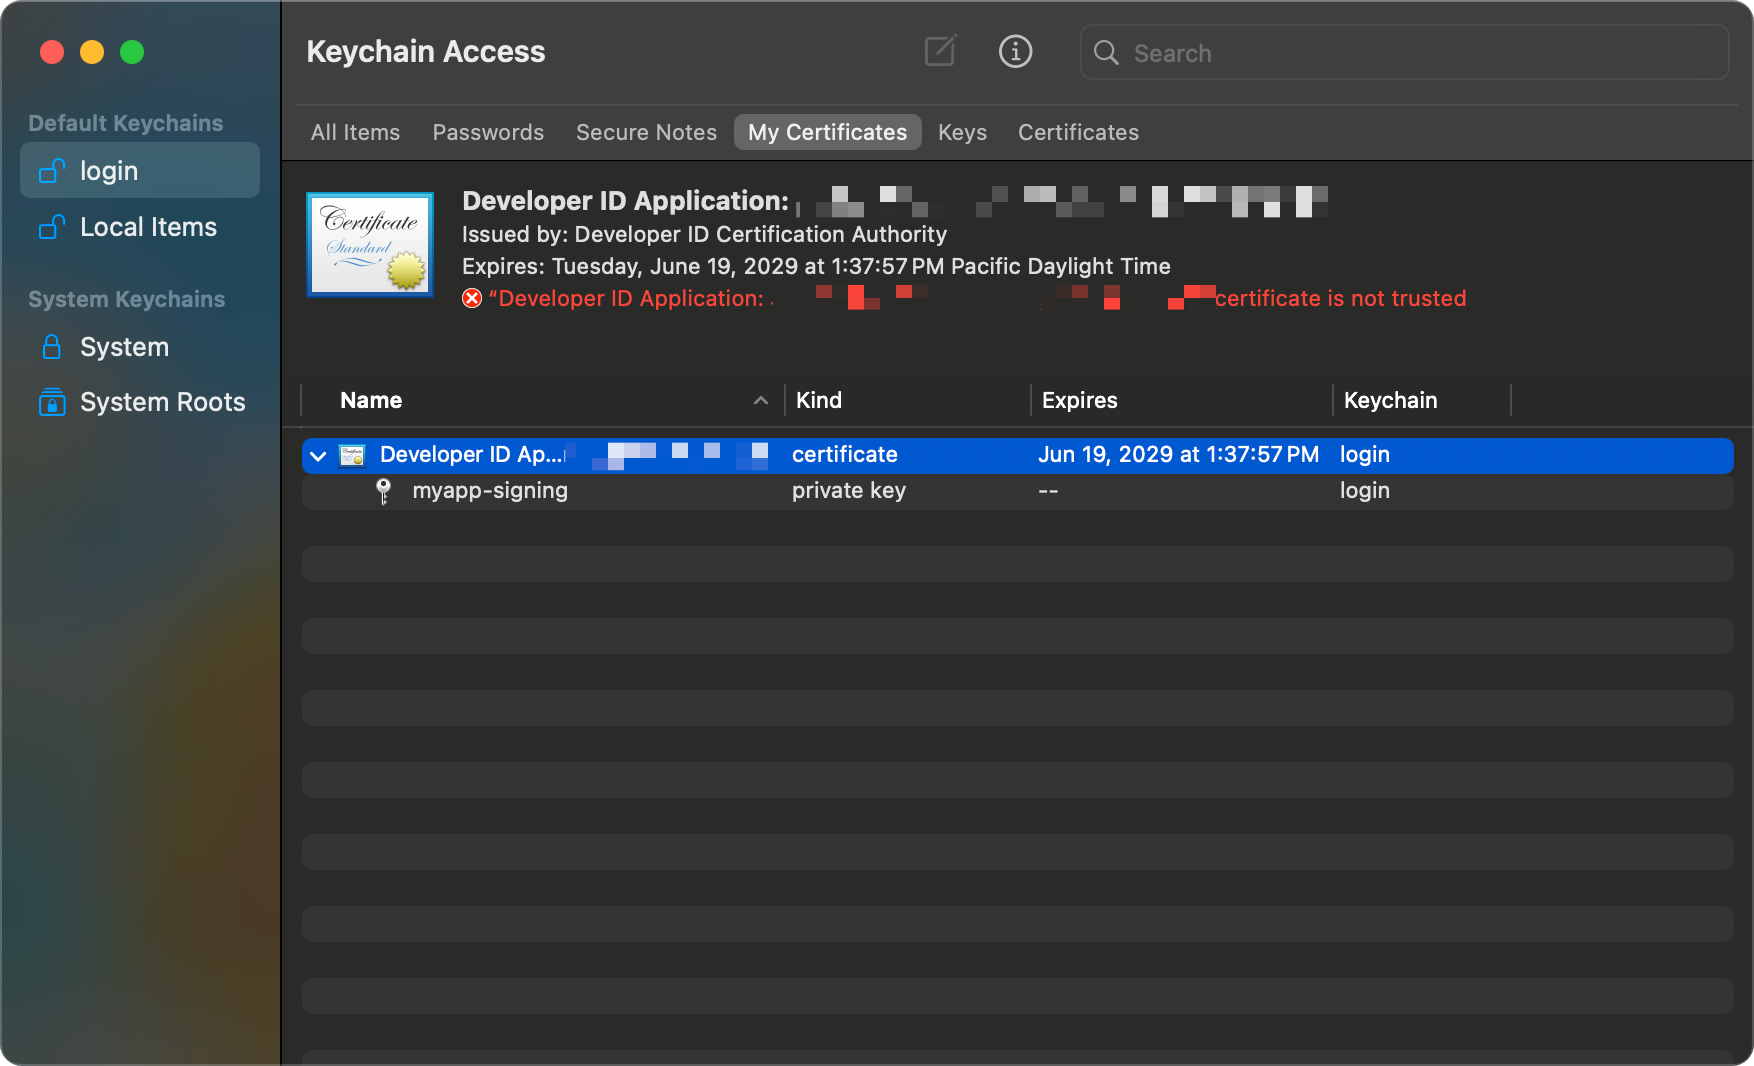
- Keeping the certificate selected (highlighted in blue), click
File > Export Items
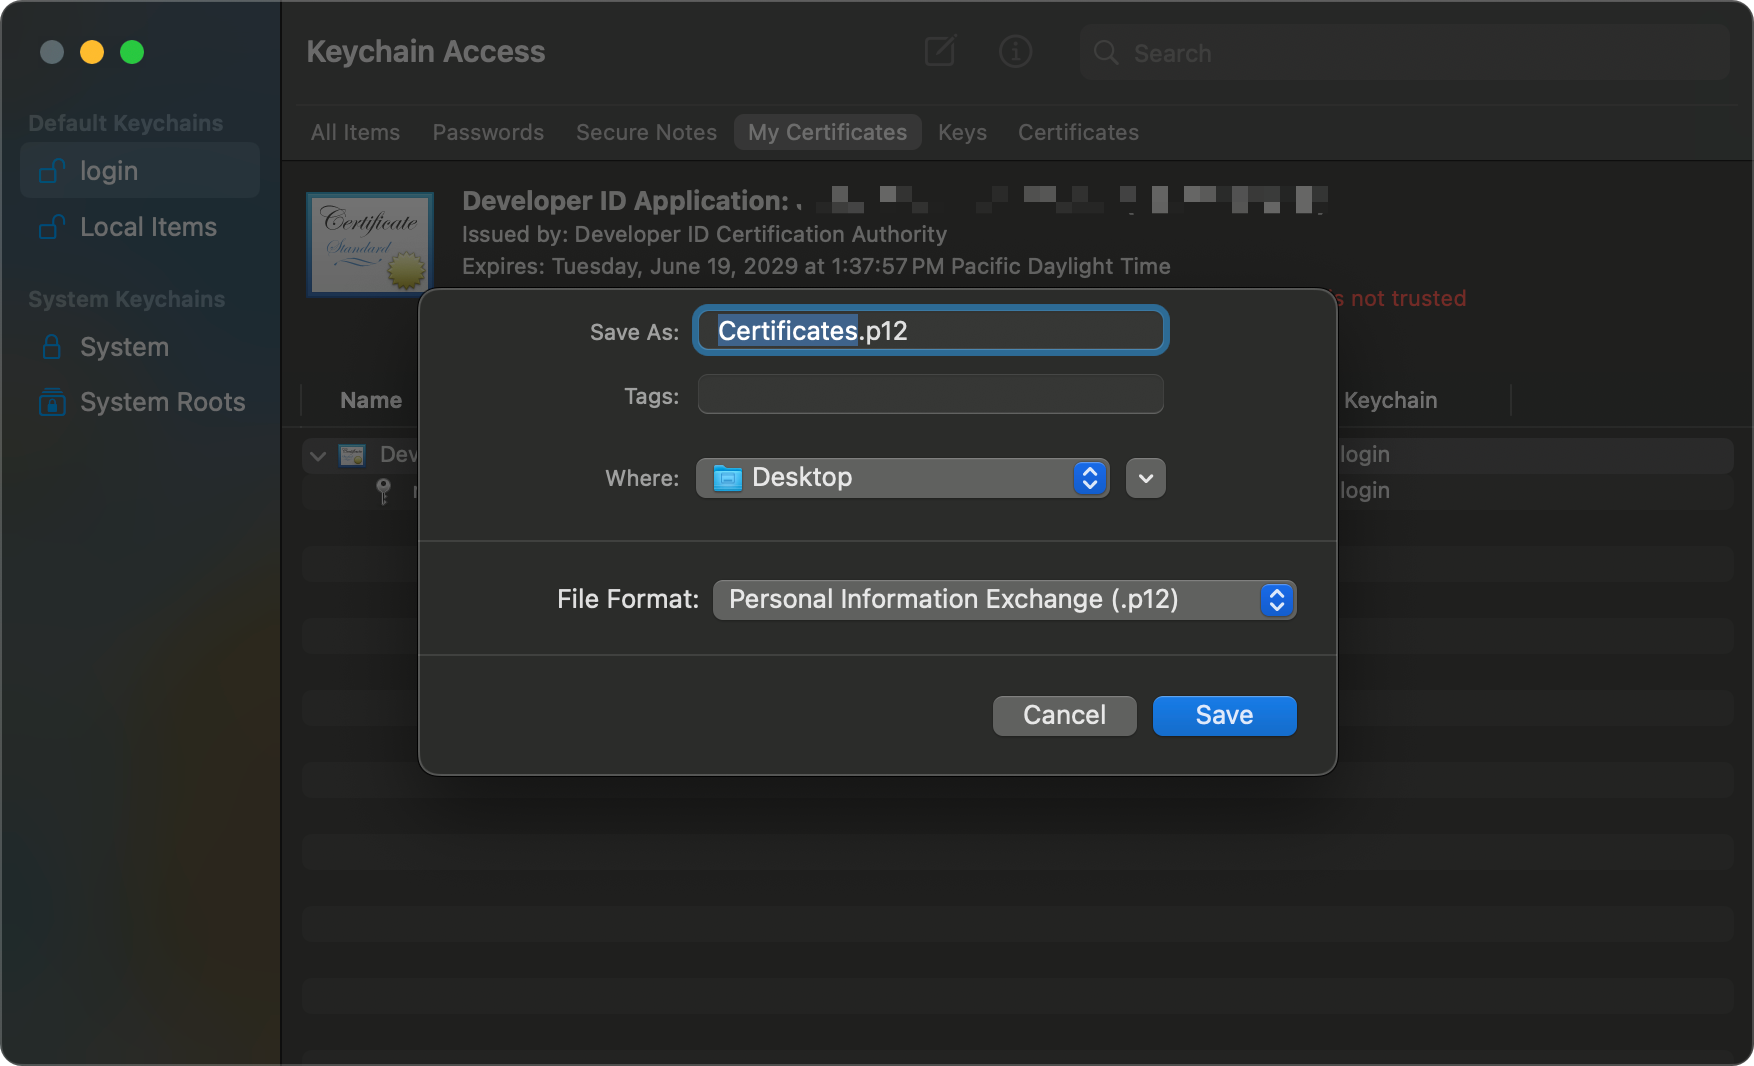
- Ensure
File Formatis set toPersonal Information Exchange (.p12). Feel free to change the file name, but keep in mind the guide won't know what you picked 😉- When asked for a password, generate one randomly (e.g., using 1Password), or use one you'll remember. You WILL need this later.
- You should now have a
Certificates.p12file that we can give to GoReleaser later 🚀
Creating an App Store Connect API Key
Navigate to https://appstoreconnect.apple.com/access/integrations/api/new
- This will pop up a dialog asking you to create an API Key.
Name:your_app_name(you could probably pick something else, if required)Access:App Manager
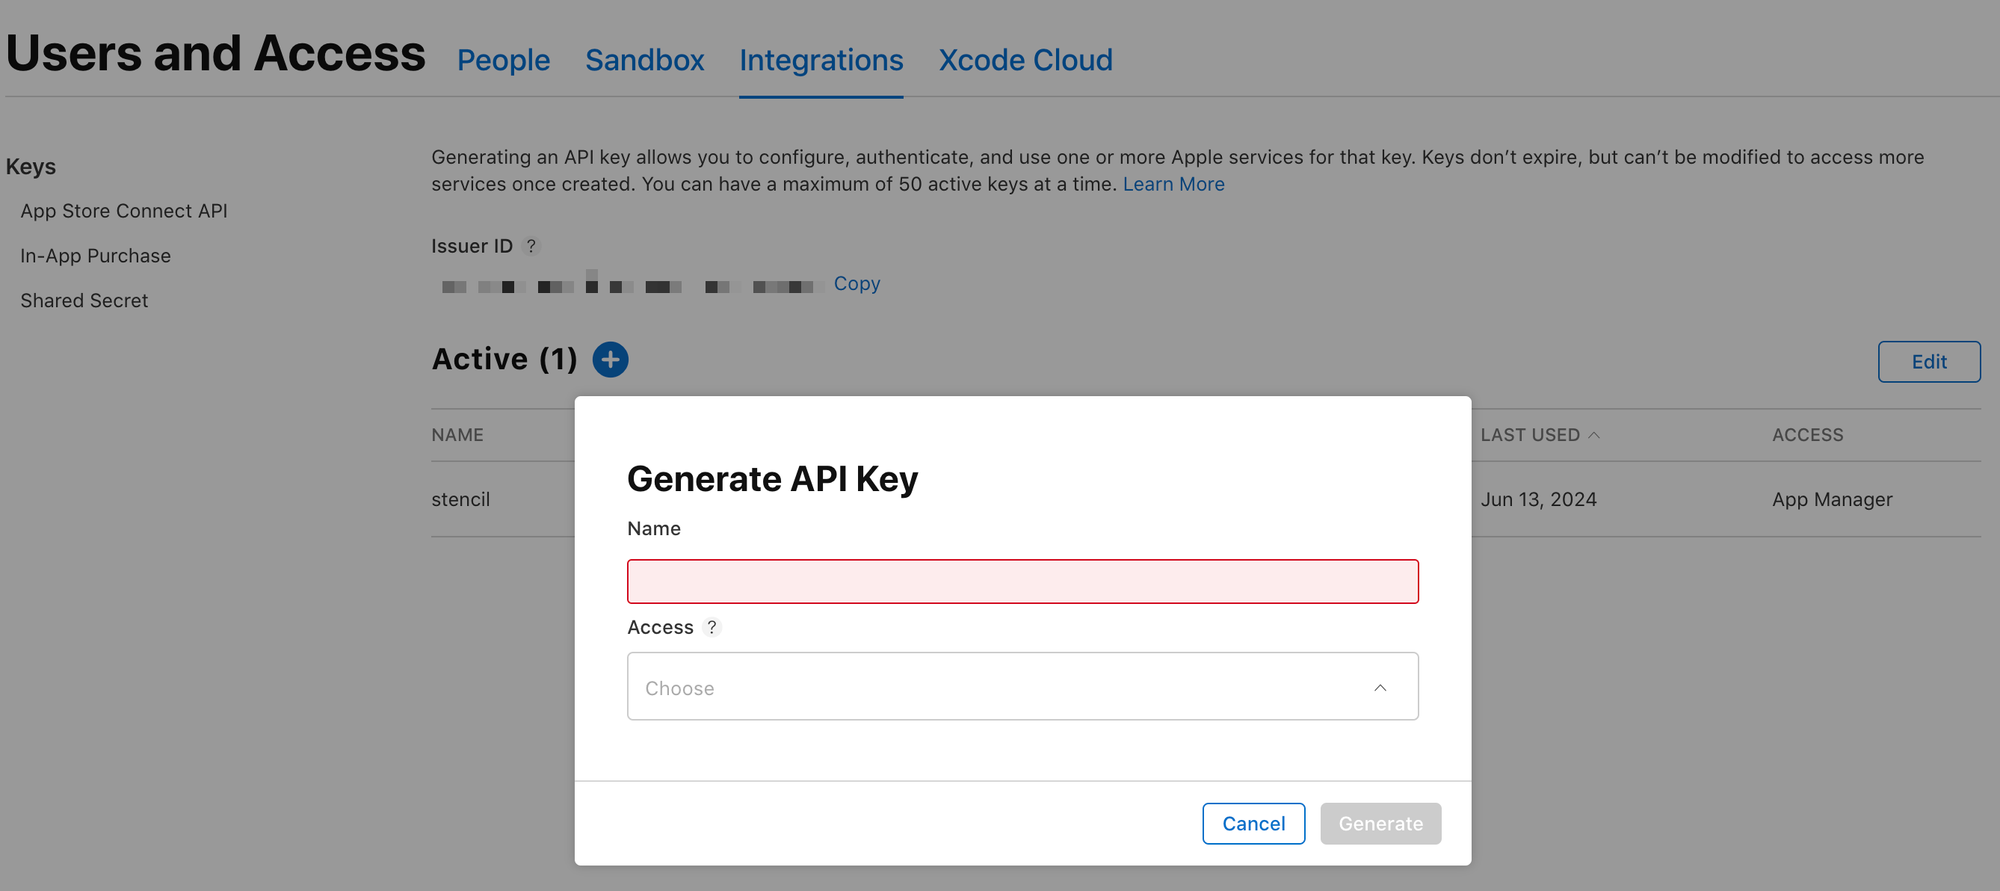
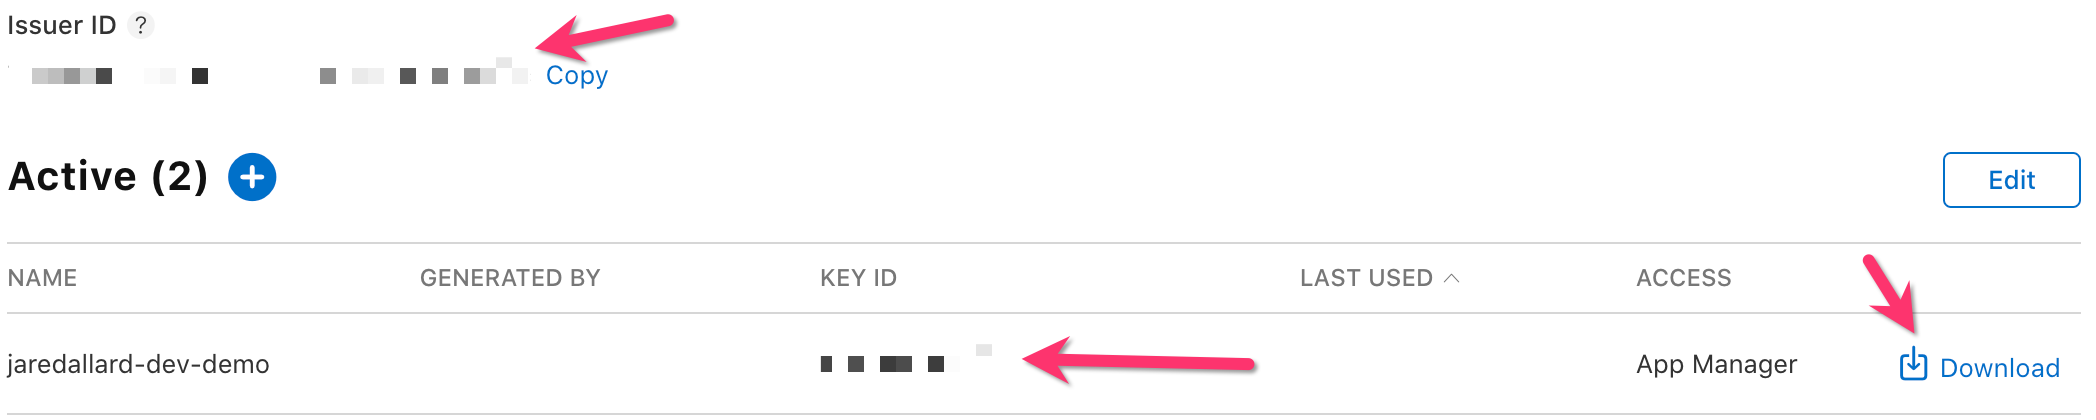
- Once you click "generate", you'll be able to download a
.p8containing the API key once. ClickDownloadand take note of:Issuer IDKey ID
Now we're ready to hook everything up to GoReleaser!
Configuring GoReleaser
Setting up GoReleaser to notarize macOS binaries is pretty straight forward. Below is the required configuration, that's annotated to describe what each field does:
notarize:
  macos:
    # This prevents notarization from failing if the host isn't configured
    # to do it (it gets skipped).
    - enabled: '{{ isEnvSet "MACOS_SIGN_P12" }}'
      sign:
        # base64 encoded represtentation of the Certificates.p12
        certificate: "{{ .Env.MACOS_SIGN_P12 }}"
        # plain text password used when exporting the .p12
        password: "{{ .Env.MACOS_SIGN_PASSWORD }}"
      notarize:
        # Issuer ID from creating the API Key earlier
        issuer_id: "{{ .Env.MACOS_NOTARY_ISSUER_ID }}"
        # ID of the API Key generated earlier
        key_id: "{{ .Env.MACOS_NOTARY_KEY_ID }}"
        # base64 encoded representation of the .p8 (API Key)
key: "{{ .Env.MACOS_NOTARY_KEY }}"Now, when you run goreleaser locally or in CI (ensuring those environment variables are set), your application will automatically be notarized by macOS. Note that it will take awhile the first time (it took 2 hours), but subsequent uploads should be under 15 minutes.
For debugging/visibility into this process, you can use quill (used under the hood by GoReleaser!). For example, to see if a binary is signed or not:
go run github.com/anchore/quill/cmd/quill@latest describe <binaryPath>
Or, to list all submissions for your Developer Account:
# Note: You'll need to set --notary-issuer, --notary-key, and
# --notary-key-id to their respective values. For help, see
# 'submission list --help`.

go run github.com/anchore/quill/cmd/quill@latest submission list
That's it! If you run into any issues, please feel free to leave a comment or otherwise reach out to me 😄